

How to remove a self-drilling screw?
Views: 0 Author: Site Editor Publish Time: 2025-09-01 Origin: Site


You can easily remove a self drilling screw by using a screwdriver or power drill that matches the screw head. For metal or wood, pick the right bit and use steady pressure. Good tools help you avoid damaging your project during installation or removal. If you face a stubborn self-tapping screw, don’t worry. With a little patience, you’ll get those screws out safely.
Key Takeaways
Use the right tools for removal. A matching screwdriver or drill bit prevents stripping and makes the job easier.
Prepare your workspace before starting. Clear debris and score painted surfaces to avoid damage during removal.
Apply steady pressure and go slow. This helps keep the tool engaged and prevents overheating or damage to the material.
For stubborn screws, consider specialty tools like manual impact drivers or left-handed drill bits to help grip and turn them out.
Always check for resistance. If a screw feels stuck, stop and assess the situation before applying more force.
Tools for Removing Self-Drilling Screws
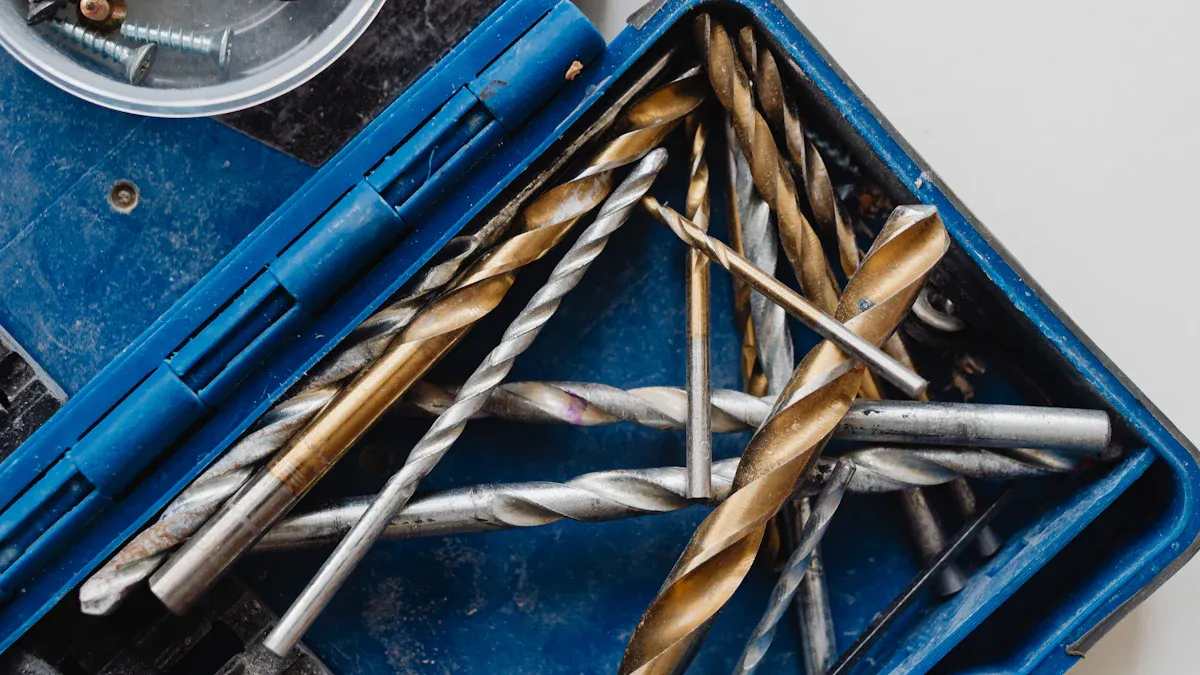
When you want to remove self-drilling screws, having the right tools makes the job much easier. You can avoid damaging your project or the fasteners by picking the right equipment for the material you’re working with. Let’s look at the best tools for both metal and wood projects.
Screwdrivers and Power Drills
You can start with a basic screwdriver that matches the head of your self-drilling screws. For most jobs, a Phillips or flathead screwdriver works well. If you need more power, grab a cordless drill with the correct bit. This helps you remove self-drilling screws for metal or wood quickly and with less effort. Make sure the bit fits snugly in the screw head to prevent stripping.
Here are some essential tools professionals recommend for removing self-drilling screws:
Dremel tool – Use this to create a new slot in the screw head if it’s damaged.
Manual impact drivers – These deliver a strong twist with a hammer, perfect for stubborn screws.
Left-handed drill bits – These grip and turn screws out as they spin counterclockwise.
Welded nut method – Weld a nut onto the screw head for extra grip, especially with larger screws.
Pliers or locking pliers – These help you grip and turn exposed screw heads.
You can use these tools for self-drilling screws for wood, self-drilling screws for steel, and even self-drilling screws for thick steel.
Specialty Tools for Stuck Screws
Sometimes, self-drilling screws get stuck or stripped. Specialty tools can help you out in these situations. Here’s a quick guide:
Tool Type | Description |
|---|---|
Spiral screw extractor | Drills into the screw head and uses reverse threads to grip and turn it out. |
Extraction pliers | Grips damaged screw heads firmly for easy removal. |
Stud and bolt extractor tool | Tightens around the screw or bolt head and turns it counterclockwise for removal. |
Tip: Always check the size of your self-drilling screws before choosing a tool. Using the right size helps you avoid damaging the fasteners or the material.
With these tools, you can handle self-drilling screws for metal, wood, and even thick steel. You’ll find that removing screws becomes much less stressful when you have the right gear.
Removal Steps for Self-Drilling Screws
Preparing the Area
Before you start removing self-drilling screws, take a moment to get your workspace ready. Clear away any debris or loose material around the screw heads. This helps you see what you’re working with and prevents tools from slipping. If you’re working on a painted surface, use a utility knife to score around the screw head. This stops paint from chipping or tearing when you back out the screw.
Tip: Always wear safety glasses and gloves. Metal shavings or wood splinters can fly up when you remove screws.
Check that you have the right screwdriver or drill bit for your self drilling screw. A snug fit keeps the screw head from stripping. If you’re working with power tools, set them to reverse and use a slow speed at first. This gives you more control and helps you avoid damaging the material.
Removing from Metal
Taking out self-drilling screws from metal can feel tricky, but you can make it easy with the right approach. Here’s a step-by-step guide:
Choose the right tool. Match your screwdriver or drill bit to the screw head. A perfect fit prevents stripping.
Apply steady pressure. Push firmly into the screw as you turn it counterclockwise. This keeps the bit engaged and stops it from slipping.
Go slow. Use a slow speed on your drill. Fast spinning can heat up the screw and make it harder to remove.
Feel for resistance. If the screw feels stuck, stop and check for rust or debris. You might need to spray a little lubricant around the screw to loosen it.
Use specialty tools if needed. If the screw won’t budge, try a manual impact driver or a left-handed drill bit. These tools grip the screw and help turn it out without damaging the metal.
Common challenges when removing self-drilling screws for metal include stripped heads and overtightened screws. You can avoid these problems by using the right tool, applying steady pressure, and stopping when you feel resistance. Some people use a torque wrench to control the force and prevent over-tightening. If you’re working with thick steel, consider using washers to spread out the force and protect the surface.
Note: If you want to learn how to screw into metal without damaging the threads, always pre-drill a pilot hole. This makes both installation and removal much easier.
Removing from Wood
Removing self-drilling screws from wood takes a gentle touch. You want to avoid splitting the wood or leaving behind a damaged hole. Here’s how you can do it:
Use a hairdryer on the highest setting to heat the wood around the screw for several minutes. The heat causes the wood to swell, loosening the grip on the screw.
Quickly grab your screwdriver and turn the screw out before the wood cools and contracts.
If the screw head is damaged, drill a small pilot hole and tap a screw extractor into place. This tool grips the inside of the screw and helps you back it out.
For stubborn screws, switch to a larger bit or use a socket wrench for more torque. Sometimes, tapping the handle of your screwdriver with a hammer can help break the screw loose.
If paint is holding the screw in place, carefully remove the paint around the screw head with a utility knife or scraper.
Tip: Always work slowly and check the wood for cracks as you remove self-drilling screws. If you notice any damage, stop and adjust your technique.
You’ll find that self-drilling screws come out of wood more easily if you avoid over-tightening during installation. If you plan to reuse the hole, fill it with wood filler and let it dry before driving in a new screw.
By following these steps, you can remove self-drilling screws from both metal and wood without damaging your project. Take your time, use the right tools, and you’ll get great results every time.
Troubleshooting Stuck or Stripped Screws
Getting stuck or stripped self-drilling screws out can feel frustrating, but you have options. Let’s break down what you can do when these fasteners refuse to budge.
Stripped Self-Drilling Screws
When the head of a self-drilling screw gets stripped, your screwdriver or drill bit just spins. You can try a few tricks to get it out:
Use pliers. Grab the screw head with locking pliers and turn it counter-clockwise. This works well if the head sticks out a bit.
Try the rubber band method. Place a wide rubber band over the stripped head. Push your screwdriver into the band and turn. The rubber fills the gaps and gives you extra grip.
Gorilla Glue and Allen wrench. Put a drop of glue in the screw head, insert an Allen wrench, and let it cure. Once the glue sets, twist the wrench to back out the screw.
Drill a new slot. Drill a small hole in the screw head. Use a Phillips bit in reverse to remove the screw.
Tip: Always use the right size bit for self-drilling screws to avoid stripping in the first place.
Rusted or Stuck Screws in Metal
Metal can make things tougher, especially if rust sets in. If your self-drilling screws or a self-tapping screw gets stuck in metal, try these steps:
Spray a little penetrating oil around the screw. Wait a few minutes for it to soak in.
Tap the handle of your screwdriver gently with a hammer. This can break the rust’s grip.
Use a manual impact driver for extra force. This tool delivers a strong twist and helps loosen stubborn screws.
If nothing works, try a left-handed drill bit. It grips and spins the screw out as you drill in reverse.
Note: Pre-drilling a pilot hole during installation can make future removal of self-drilling screws much easier.
Stuck Screws in Wood
Wood holds onto screws tightly. Sometimes, the wood grips the threads so hard that you can’t turn the screw without stripping the head. Rust can also make removal harder, especially for a self-tapping screw.
Heat the area with a hairdryer. Warm wood expands and loosens its grip on the screw.
Use extraction pliers if the head is exposed.
If the screw head is stripped, use a screw extractor tool. Tap it into the screw and turn it out.
For painted screws, score around the head with a utility knife before removal.
Remember: Work slowly and check for cracks in the wood. If you damage the hole, fill it with wood filler before reusing it.
With these tips, you can handle most problems with self-drilling screws and other fasteners, whether you’re working with metal or wood.
Tips for Best Results with Self-Drilling Screws
Preventing Damage
You want your project to look great and last a long time. Preventing damage when removing self-drilling screws is all about using the right approach. Here are some practical tips:
Choose the correct screwdriver or drill bit size. This helps you avoid stripping the screw head.
Use a torque-limiting tool. This keeps you from over-tightening, which can break the screw or damage the head.
Drill a small pilot hole for tough materials. This guides the screw and makes removal easier.
Try a torque wrench. It helps you apply just the right amount of force.
Pay attention to resistance. If you feel the screw getting tight, stop before you damage the screw or the material.
Remember: Taking your time and using the right tools will help you avoid headaches later.
Pressure and Alignment
Getting the right pressure and alignment makes a big difference when working with self-drilling screws. If you push too hard or angle your tool, you might strip the head or damage the surface. Keep your screwdriver or drill bit straight and apply steady, even pressure. This helps the screw back out smoothly, especially if you need to screw wood and metal simultaneously. If you notice the screw isn’t moving, don’t force it. Pause and check your alignment or switch to a specialty tool.
Choosing the Right Screw
Picking the right self-drilling screw for your project saves you time and trouble. Here’s what you should consider:
Check the diameter and length. Longer screws work well for construction, while shorter ones fit electronics.
Think about the material and environment. Stainless steel resists corrosion, so it’s great for outdoor use. Carbon steel fits most indoor jobs.
Match the thread type to your needs. Some threads work better for metal, others for wood.
Know your load requirements. Heavy-duty projects need screws with higher load-bearing capacity.
Look at surface treatments. Some screws have coatings that fight rust and look better.
Pick a screw that’s easy to install and remove. Some head shapes make drilling and fastening in one step much easier.
Screw Type | Characteristics | Applications |
|---|---|---|
Self-Drilling Screws | Thread-forming with a cutting drill point, no pre-drilling needed. | Fastening panels and profiles in construction. |
Low Drilling Capacity | Best for thin sheet metal. | Lightweight metal projects. |
Large Drilling Capacity | Cuts through thick materials, up to 16 mm steel. | Heavy-duty construction. |
Tip: Using the right screw and technique helps you avoid problems with self-drilling screws, self-tapping screw, and other fasteners.
You now know how to remove a self drilling screw from both metal and wood. Start by choosing the right screwdriver shape and keeping it aligned with the screw drive. Hand-tightening works best to avoid stripping. For stubborn self-drilling screws, try these tips:
Remove paint around the screw head.
Add lubricant and let it soak in.
Tap the screwdriver with a hammer.
Drill out the screw if needed.
After you finish, check your project for any damage. Using the right tools and techniques helps you get the best results every time.
FAQ
How do you remove a Self Drilling Screw without stripping the head?
You want to use the right screwdriver or drill bit for your Self Drilling Screw. Apply steady pressure and keep the tool straight. If you notice slipping, stop and switch to a better-fitting bit.
Can you reuse a Self Drilling Screw after removal?
Yes, you can reuse a Self Drilling Screw if the threads and head look good. Check for wear or damage. If you see stripped threads, pick a new screw for best results, especially with self tapping screws for metal or plastic.
What size Self Drilling Screw should you use for metal projects?
Self Drilling Screw sizes depend on your metal thickness. For thin sheet metal, use smaller screws. For thick steel, pick larger self screw options. Always match the screw size to your project for a secure hold.
Are Self Drilling Screws good for wood and plastic?
You can use Self Drilling Screws for wood. For plastic, self tapping screws for plastic work better. These screws cut threads as you drive them in, giving you a tight fit without cracking the material.
What should you do if a Self Drilling Screw gets stuck in metal?
Spray penetrating oil around the Self Drilling Screw. Wait a few minutes. Use a manual impact driver or left-handed drill bit. For stubborn self tapping screws for metal, try extraction pliers or a screw extractor tool.